EngineEars provides Record Labels with tools to streamline collaboration and project management when working with audio engineers and recording studios. These benefits include:
1. All-in-One Project Management
A comprehensive dashboard that details the statuses of all projects and studio sessions.
2. Integrated Budget Approvals
Invite label team members for budget approvals and project visibility.
3. Secure File & Asset Management
Securely access project files and assets for QC and archiving once project has been completed.
Getting Started: Label Admin
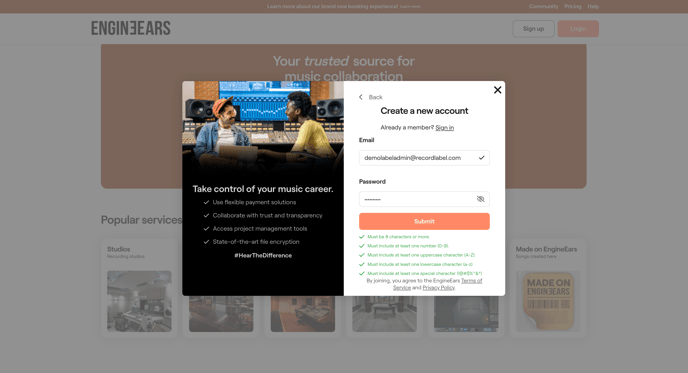
1 Sign Up
Visit EngineEars.com and click the Sign Up button at the top.
(If you have an existing account, follow these steps to Sign In)

Then click the Continue with Email button to create a new account.
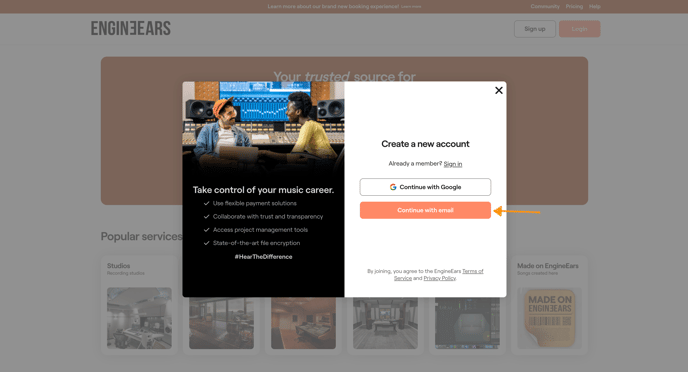
Enter your email address (at your Record Label) and a secure password, then click Submit.
2 Verify your Email
After your new account is created, you will be asked to securely verify your email address.

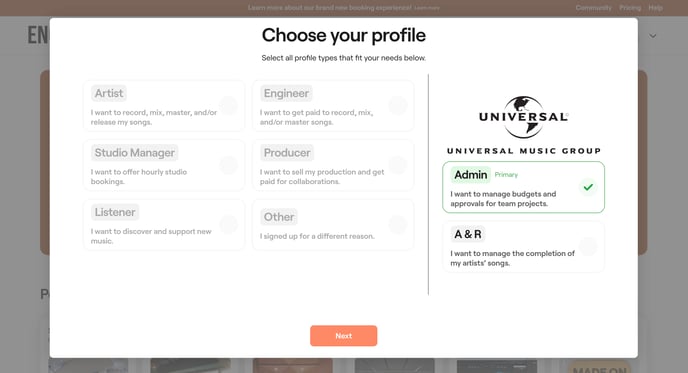
3 Choose your Profile
After your email is verified, choose your profile type, then click Next.
NOTE: Make sure to select "Admin" as your account type. If you're on a mobile device, make sure to scroll to the very bottom to see the "Admin" option and 'Next' button.
4 Choose your Record Label
Select your record label (scroll down in the list to see all available options), then click Continue.

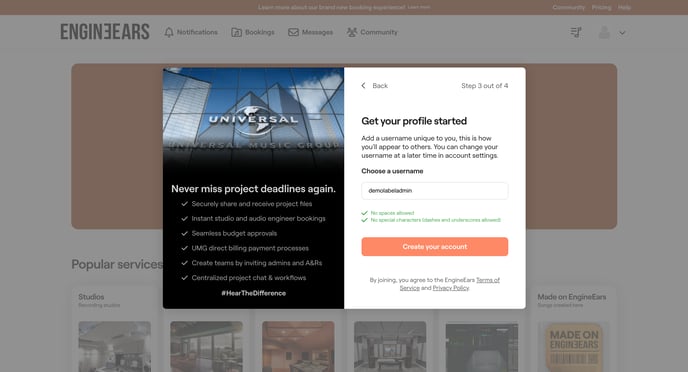
5 Create your Username
Customize your username for your new Label Admin profile on EngineEars.com, then click the Create your account button.
6 Verify your Phone
Next, you will be asked to add and securely verify your phone number. You can optionally sign up to receive SMS text message notifications to your mobile phone so that you can get real-time booking notifications and stay up to date on your project/session progress. You will need to verify your mobile phone number to opt in to these notifications.
Enter your mobile phone number (make sure it's the correct country code), then click the Add phone number button.

Enter the verification code sent to your entered mobile phone number, then click the Submit button.

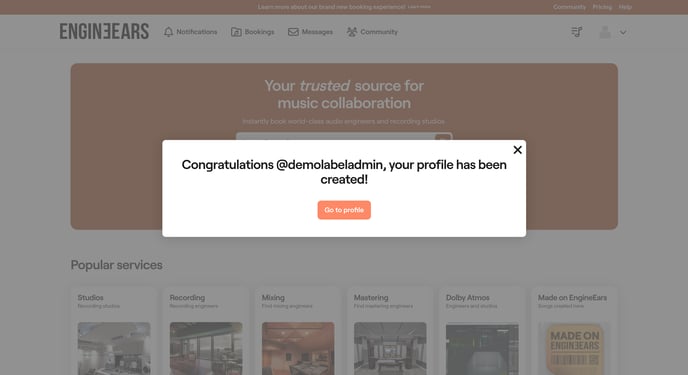
After your phone number is verified, your new Label Admin account profile is successfully created.
7 Edit Profile
Click 'Edit Profile' to update your profile photo, cover photo, bio, social accounts, location and genre! Don't forget to click 'Save Changes' once you've updated your Label Admin profile page.

8 Find Your Provider
Now that your profile is fully set up, you can proceed to search for a recording studio or audio engineer for your artists.
Explore verified recording studios near you to instantly book recording sessions for your artists, or browse the profiles of world class audio engineers to collaborate with for your artists' projects.


Apply search filters to narrow down your search results further (by service type, budget, location, genre, availability, amenities and more).

TIP: You can search audio engineers based on their past verified credits too (powered by Muso.ai). Here's how.

Alternatively, you can use the Find My Engineer tool to get matched to recommended mixing/mastering engineers tailored to your artist's unique sound.

View the studio profiles or engineer profiles you're interested in to see their services offered and pricing details.
Once you've found the provider you'd like to book for your artist, you can book a service or book a studio to get your project or session started!
💡 TIP: Need to make bookings or stay up to date while on the go? Add EngineEars to your mobile device home screen 📲
Next Steps
- Budget Approval: your designated Budget Approver will be asked to review and approve the budget request for your booked project/session to begin
- Begin recording or mixing/mastering work with your booked service provider. Upload files and take advantage of our chat messaging tools to communicate in real-time.
- Track status, share visibility/access with your invited collaborators, review files and submit feedback (e.g. revision requests and time-stamped comments).
- If the artist and/or their team is happy with the finished product, provide approval. Once approved, the engineer will be prompted to upload final deliverables.
- Submit Billing Info: your designated Admin will be asked to review and submit Direct Billing Information for your project/session to continue to QC
- After the engineer has uploaded final deliverables for the project, you will need to share the project's files to your QC team for review
- QC Approval: Once shared, your QC team will be asked to download, review and approve final asset deliverables to complete and close out the project